Going off-grid means cutting the cord with your utility company entirely, no monthly bills, no rate hikes, no dependence on an aging power grid. But figuring out how to design an off-grid solar system requires more than just buying panels and batteries. You need to accurately size every component, from your solar array to your charge controller to your battery bank, so the system actually meets your daily energy demands without falling short.
That’s where most DIY guides get it wrong. They oversimplify the math or skip critical steps like accounting for seasonal sun hours, surge loads, or days of autonomy during storms, something we see the consequences of regularly here in Florida. At Advance Solar & Spa, we’ve designed and installed over 50,000 solar energy systems since 1983, and our engineering team has worked through every sizing scenario imaginable. We know what works on paper and, more importantly, what holds up in the real world.
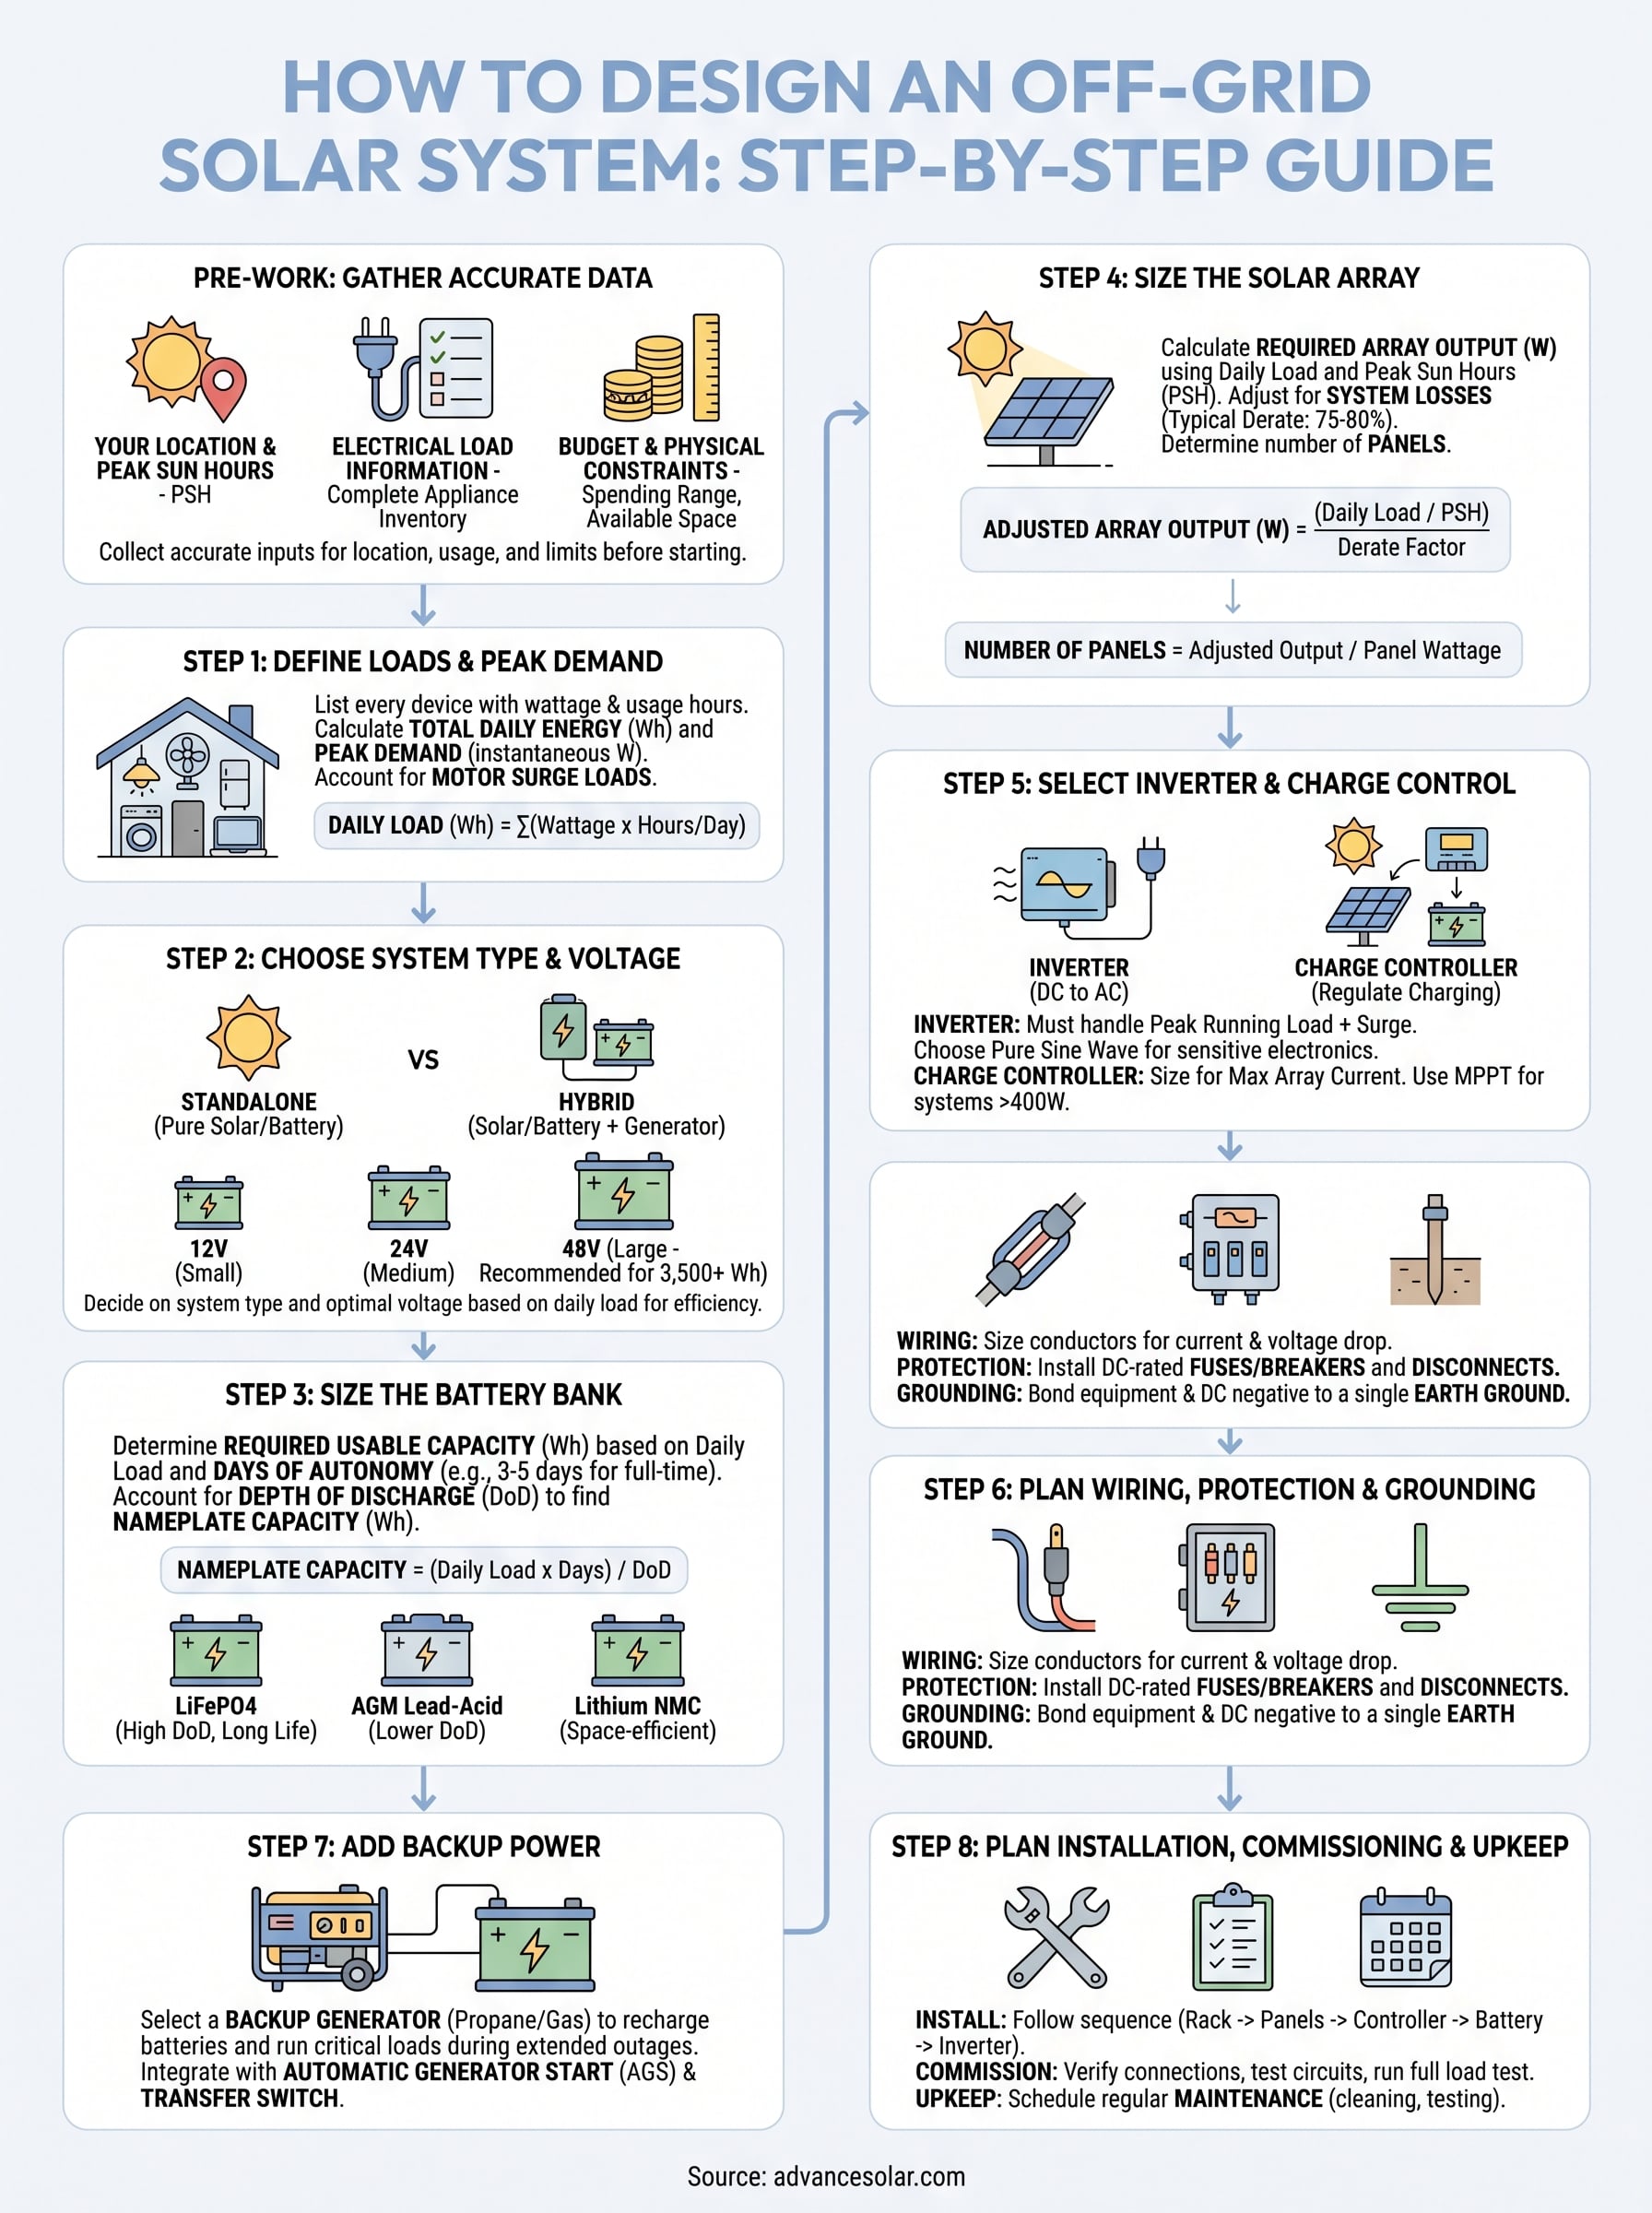
This guide walks you through the entire off-grid design process step by step. You’ll learn how to calculate your energy load, determine battery storage capacity, size your solar array, and select the right components to build a reliable, self-sufficient system. Whether you’re planning a remote cabin setup or exploring full energy independence for your home, this is the technical roadmap you need before making any purchasing decisions.
What you need before you start
Before you size a single component or order any equipment, you need to gather accurate data. Guessing at your energy consumption or your available sunlight will produce an undersized system that leaves you without power, or an oversized one that drains your budget. Knowing what to collect upfront is what separates a system that works from one that fails during the first stretch of cloudy weather.
Getting your inputs right before you size anything is the single most important step in the entire design process.
Your location and solar resource data
Your geographic location determines how much usable solar energy your panels collect on an average day. The key figure you need is your peak sun hours (PSH), which represents the equivalent number of hours per day when sunlight intensity reaches 1,000 watts per square meter. This is not the same as hours of daylight, and confusing the two is a common sizing mistake.
For reference, Fort Myers, Florida averages around 5.5 peak sun hours per day annually, while a location in the Pacific Northwest might average only 3.5. You can retrieve your location’s PSH data through NASA’s POWER Data Access Viewer, which provides free, historically validated solar irradiance data by coordinates.
Beyond sun hours, identify any shading sources at your installation site, including trees, chimneys, and neighboring structures. Even partial shading on one panel can reduce output across an entire string, so document obstructions before you finalize your array layout.
Your electrical load information
Knowing exactly what devices you plan to power is the foundation of how to design an off grid solar system that actually meets your needs. You need a complete appliance inventory with the wattage of each device and the number of hours per day you run it. Pull wattage figures from the label on the back of each unit or from the product manual.

Use this template to organize your loads:
| Appliance | Wattage (W) | Hours Used Per Day | Daily Energy (Wh) |
|---|---|---|---|
| Refrigerator | 150 | 24 | 3,600 |
| LED Lighting (8 bulbs) | 80 | 6 | 480 |
| Laptop | 65 | 8 | 520 |
| Water Pump | 750 | 1 | 750 |
| Ceiling Fan | 55 | 10 | 550 |
| Total | 5,900 |
Add up the Daily Energy (Wh) column to get your total daily load. This number drives every sizing calculation in the steps ahead, so take the time to make it accurate.
Your budget and physical constraints
Your budget shapes every component decision in the system, from battery chemistry to inverter capacity. Before committing to any design direction, set a realistic spending range and document the physical limits of your installation site.
Measure the available roof or ground space in square feet, since this directly caps how many panels you can fit. A standard residential solar panel is roughly 65 inches by 39 inches and produces between 350 and 400 watts. If your available area fits only 8 panels, your maximum array output is around 3,200 watts, which may require you to trim your load list or prioritize essential circuits.
Confirm whether your project requires permits or local code compliance before installation begins. In Florida, off-grid systems still require building permits and electrical inspections, and all wiring must conform to the National Electrical Code (NEC). Catching these requirements before you finalize your design prevents expensive changes after equipment has already been purchased.
Step 1. Define loads and peak demand
Defining your loads is the first calculation you run in any off-grid design. Every component you size downstream, from your battery bank to your solar array, depends on this number being accurate. Skip it or guess at it, and you’ll build a system that either runs short on power regularly or costs far more than it needs to.
List every load you plan to power
Start by walking through your home or structure and writing down every electrical device you intend to run on the system. Include the wattage of each device and your honest estimate of how many hours per day you use it. Check the label on the back of each appliance or pull the product spec sheet to get exact wattage figures rather than estimating from memory.
If you’re unsure of a device’s actual wattage, use a plug-in energy meter to measure the real draw before you lock in your load list.
Use this table format to organize your inventory:
| Appliance | Wattage (W) | Hours/Day | Daily Energy (Wh) |
|---|---|---|---|
| Refrigerator | 150 | 24 | 3,600 |
| LED Lights (6 bulbs) | 60 | 5 | 300 |
| Laptop | 65 | 6 | 390 |
| Phone Charger | 20 | 2 | 40 |
| Water Pump | 750 | 1 | 750 |
| Box Fan | 50 | 8 | 400 |
| Total | 5,480 |
Multiply wattage by hours per day for each row, then sum the Wh column. That total is your baseline daily energy consumption, the number you carry forward into every sizing calculation that follows.
Calculate your peak demand
Peak demand is the maximum wattage your system pulls at any single moment, and it occurs when multiple high-draw appliances run simultaneously. To find it, identify the devices that realistically overlap in operation and add their running wattages together.
For example, if your refrigerator (150W), water pump (750W), and lighting (60W) all run at once, your instantaneous peak is 960W. Your inverter must handle at least this load without tripping.
Account for motor surge loads
Motors in appliances like water pumps, air conditioners, and refrigerator compressors draw two to three times their rated wattage for one to two seconds on startup. This surge load is separate from your running wattage and must be noted for each motor-driven device in your list.
Go through your inventory and flag every motor-driven appliance, then record its surge wattage using the product’s spec sheet. Your inverter selection in Step 5 must cover the highest single surge in your system, not just the combined running load. Getting this right is a core part of how to design an off grid solar system that handles real-world conditions without component failures.
Step 2. Choose system type and voltage
The system type determines whether you rely entirely on solar and batteries or keep a backup power source in the mix. System voltage sets the efficiency and scalability of everything else in the design. Both decisions affect which components are compatible with your setup and how much power you lose to heat in your wiring. Lock these choices in early, because changing either one after you’ve purchased components is expensive and time-consuming.
Standalone vs. Hybrid System
A standalone (pure off-grid) system runs entirely on solar energy stored in batteries, with no utility grid connection and no automatic backup. This setup works well for remote locations where running a grid line would cost more than the solar system itself, such as a backcountry cabin or an agricultural outbuilding with minimal daily loads.
A hybrid off-grid system adds a backup generator, typically propane or diesel-powered, that activates automatically when battery reserves drop below a set threshold. This is the more practical choice for full-time residential use, especially in regions with unpredictable sun exposure. If you’re working through how to design an off grid solar system for a primary residence in Florida, a hybrid approach lets you size your battery bank for typical conditions rather than worst-case extended weather events, which keeps your design leaner and your budget lower.
Choosing a hybrid setup lets you size your battery bank for average conditions rather than worst-case scenarios, which meaningfully reduces your upfront system cost.
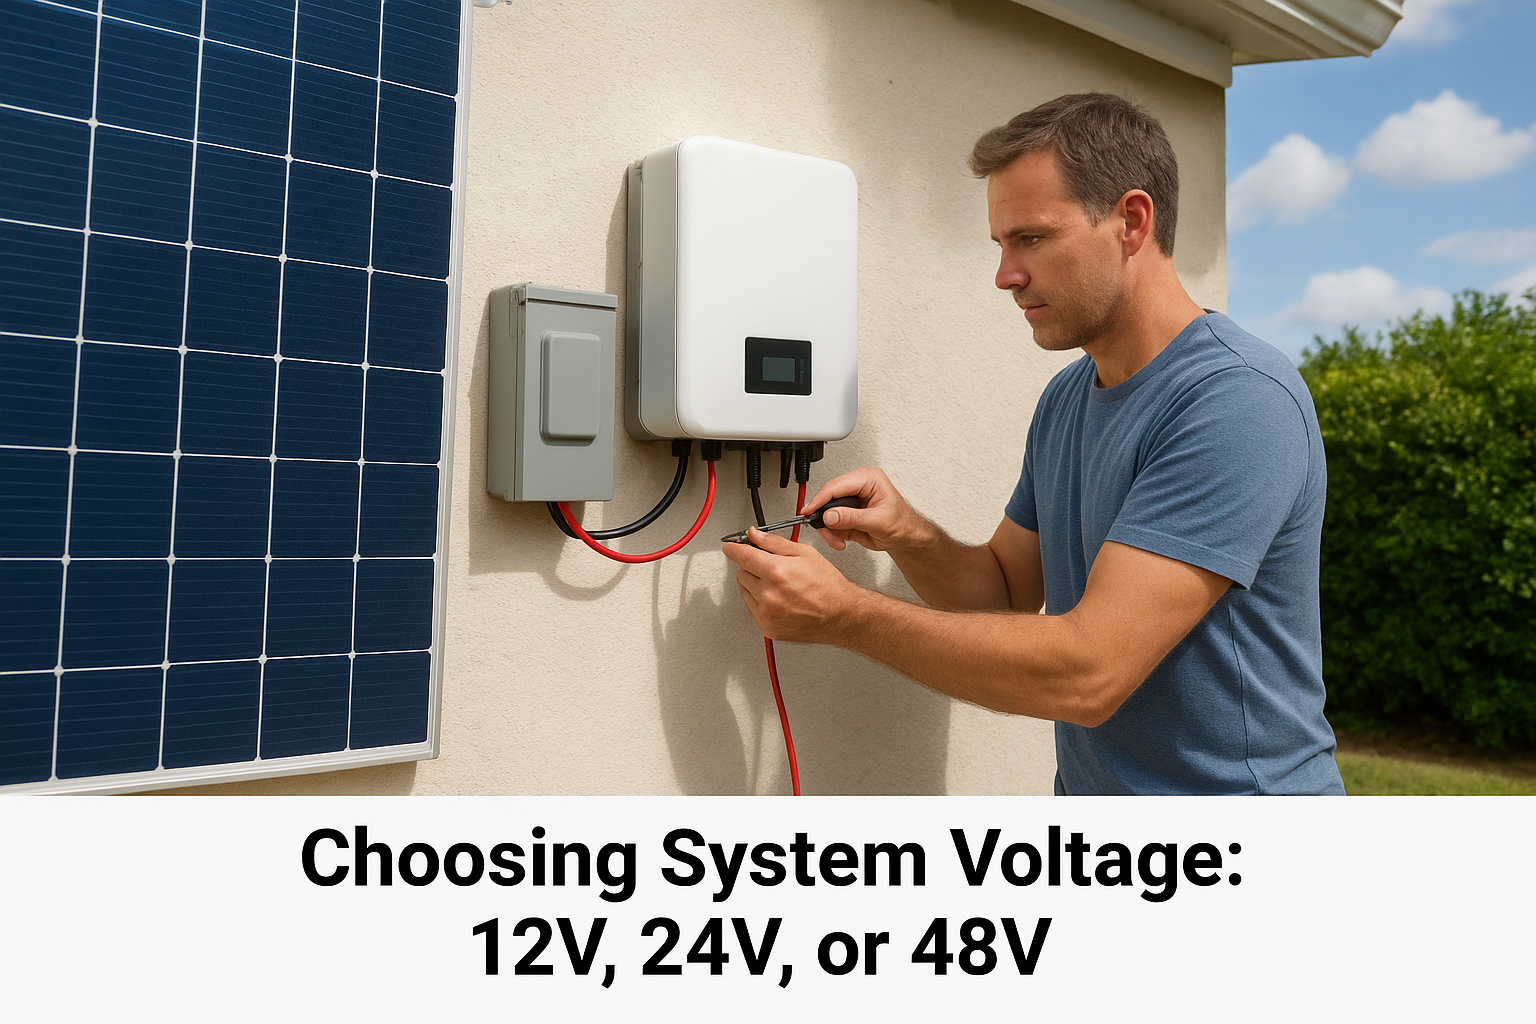
Choosing System Voltage: 12V, 24V, or 48V
Your system voltage determines the conductor size required throughout your installation, the compatibility of your charge controller and inverter, and how efficiently current moves from your panels to your batteries to your loads. Lower voltages require thicker wire to carry the same wattage, which drives up both material and labor costs at scale.
Use this table to match system voltage to your expected daily load from Step 1:
| Daily Load | Recommended Voltage | Best For |
|---|---|---|
| Under 1,000 Wh | 12V | Small cabins, RVs, minimal loads |
| 1,000 Wh to 3,500 Wh | 24V | Medium cabins, seasonal homes |
| 3,500+ Wh | 48V | Full-time residences, larger systems |
48V systems are the standard for full-time residential off-grid use because they minimize current flow, reduce required wire gauge, and work with the widest selection of high-capacity inverters and charge controllers. Most modern battery platforms, including Enphase and Tesla energy storage solutions, operate at voltages compatible with 48V system designs. If your daily load exceeds 3,500 Wh, design around 48V from the start rather than retrofitting later at a higher combined cost.
Step 3. Size the battery bank
Your battery bank is the foundation of your off-grid system’s reliability. It stores the energy your panels collect during daylight hours and delivers it through the night, during cloudy days, and across multi-day weather events. Undersizing your battery bank is one of the most common mistakes in off-grid design, and it typically shows up as a system that works fine on sunny days but fails during the first extended storm or stretch of overcast weather.
Calculate days of autonomy
Days of autonomy refers to how many consecutive days your system can power your loads with zero solar input, drawing purely from stored energy. For a remote cabin used only on weekends, one to two days is often enough. For a full-time Florida residence, where hurricanes can block sun for several days at a stretch, three to five days is a more defensible target.
Use this formula to calculate your required usable battery capacity:
Required Usable Capacity (Wh) = Daily Load (Wh) x Days of Autonomy
For example, if your daily load from Step 1 is 5,480 Wh and you want three days of autonomy, your target is 16,440 Wh of usable storage before accounting for any losses.
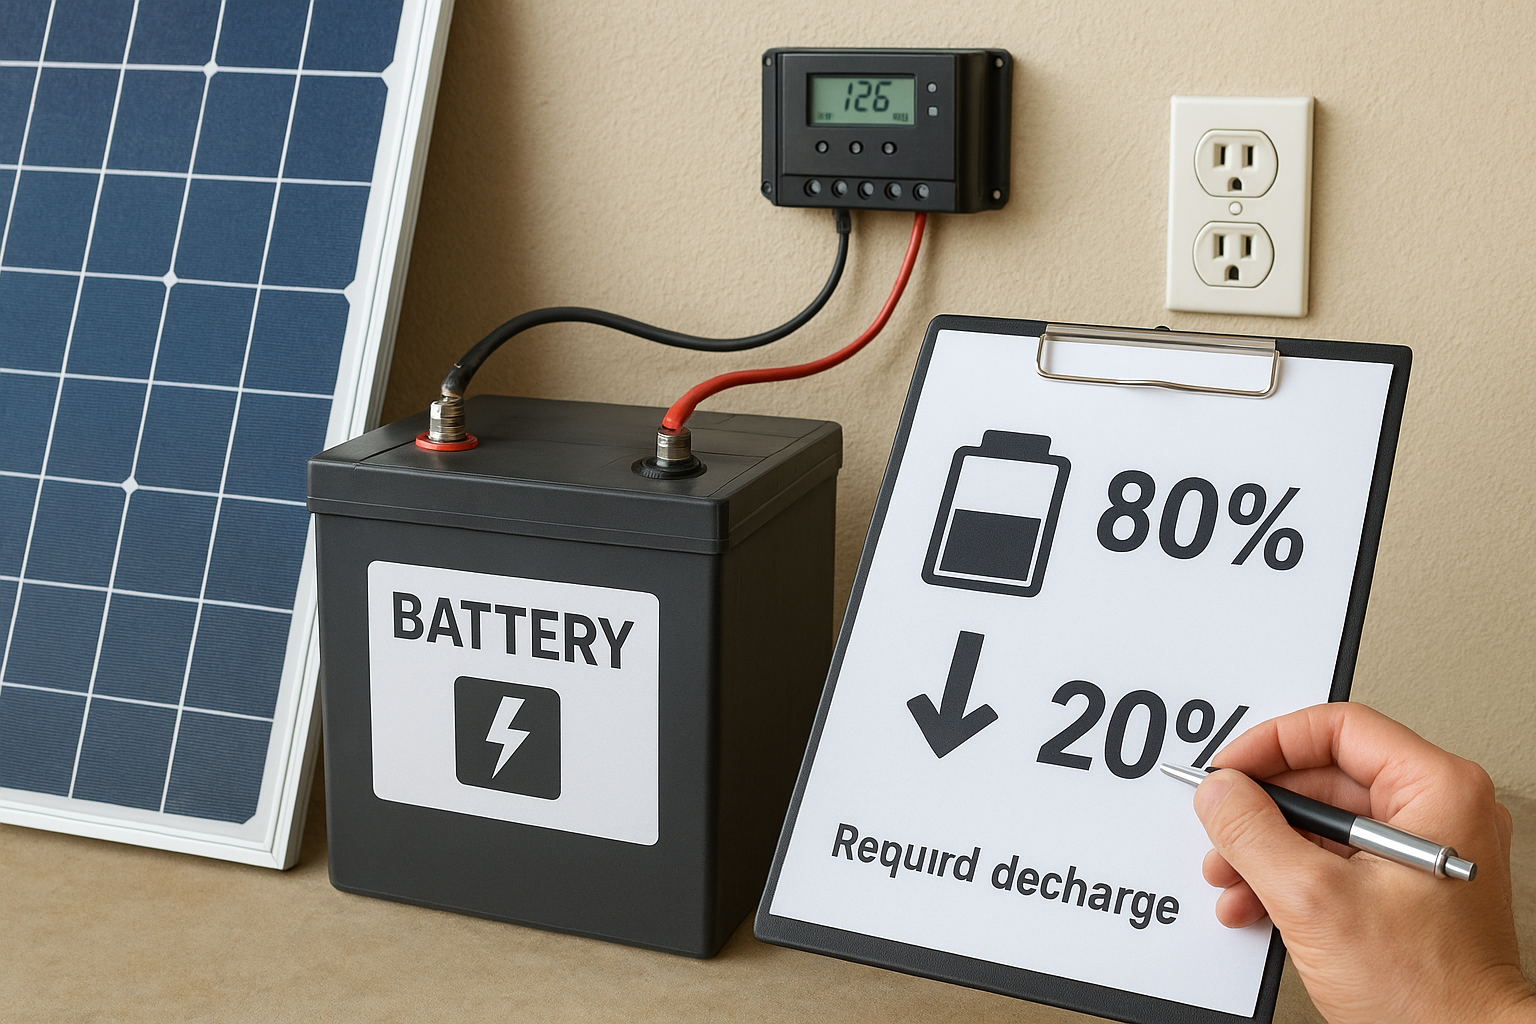
Factor in depth of discharge and efficiency losses
Raw battery capacity and usable capacity are not the same number. Depth of discharge (DoD) is the percentage of a battery’s total capacity you can safely use without degrading it prematurely. Most lithium iron phosphate (LiFePO4) batteries allow an 80 to 95 percent DoD, while lead-acid batteries are typically limited to 50 percent to preserve their lifespan.
Always size your battery bank against usable capacity, not the nameplate rating printed on the battery label.
Apply this formula to find your required nameplate capacity:
Nameplate Capacity (Wh) = Required Usable Capacity (Wh) / DoD
Using the example above with a 90 percent DoD LiFePO4 battery: 16,440 / 0.90 = 18,267 Wh of nameplate capacity required.
Choose your battery chemistry
Battery chemistry affects your upfront cost, cycle lifespan, maintenance requirements, and total system weight. The table below compares the three options most commonly used in residential off-grid systems.
| Chemistry | Typical DoD | Cycle Life | Relative Cost | Best For |
|---|---|---|---|---|
| LiFePO4 | 80-95% | 3,000-6,000 | High | Full-time residences |
| AGM Lead-Acid | 50% | 400-700 | Low | Budget builds, seasonal use |
| Lithium NMC | 80-90% | 1,000-2,000 | Medium-High | Space-constrained installs |
Knowing how to design an off grid solar system means selecting a battery chemistry that fits your actual usage pattern and budget, not simply the option with the largest advertised capacity.
Step 4. Size the solar array
Your solar array needs to replace every watt-hour your batteries discharge each day, plus cover the losses that occur between the panel and the load. Sizing your array correctly means your system recharges fully on an average sun day without depending on your backup generator more than intended. Use your daily load from Step 1 and your peak sun hours from the pre-work section as the two core inputs for every calculation here.
Calculate your required array output
The formula for minimum array output is straightforward:
Required Array Output (W) = Daily Load (Wh) / Peak Sun Hours (PSH)
Using the example load of 5,480 Wh and a Florida location with 5.5 peak sun hours, the raw calculation gives: 5,480 / 5.5 = 996W. That figure assumes a perfect system with zero losses, which no real installation achieves. You’ll adjust for losses in the next step.
Always base your array sizing on your worst-month peak sun hours rather than the annual average, so your system holds up when seasonal sun drops.
Account for system losses
Real-world systems lose energy to heat, wiring resistance, battery round-trip inefficiency, and inverter conversion. A combined derate factor of 75 to 80 percent is a practical figure for most off-grid systems. Apply it by dividing your raw array output by the derate factor:
Adjusted Array Output (W) = Raw Array Output (W) / Derate Factor
Using 0.78 as the derate: 996 / 0.78 = 1,277W of installed panel capacity required for the example system.
| Loss Source | Typical Efficiency |
|---|---|
| Inverter conversion | 93-96% |
| Battery round-trip | 90-95% |
| Wiring and connections | 97-98% |
| Temperature derating | 80-90% |
| Combined derate factor | 75-80% |
Determine how many panels you need
Divide your adjusted array output by the wattage of the specific panel model you plan to install. Standard residential panels today produce 380 to 415 watts each, so use your chosen model’s nameplate wattage rather than a generic estimate.

Number of Panels = Adjusted Array Output (W) / Panel Wattage (W)
For the example: 1,277 / 400 = 3.2 panels, which rounds up to 4 panels at 400W each, giving you 1,600W of installed capacity. That small buffer above the minimum is intentional. Knowing how to design an off grid solar system means building in headroom for dust accumulation, gradual module aging, and days when sunlight arrives at a lower angle than the seasonal average.
Step 5. Select inverter and charge control
Your inverter and charge controller are the two active components that manage how power flows through your entire system. The inverter converts stored DC battery power into the AC electricity your appliances use, while the charge controller regulates the current flowing from your panels into your battery bank. Selecting the wrong size or type for either component will limit your system’s output and can cause premature equipment failure.
Choosing the Right Inverter
Your inverter must handle two separate numbers from your earlier calculations: running wattage and surge wattage. Running wattage is the combined draw of all loads operating simultaneously. Surge wattage is the spike produced by motor-driven appliances during startup, which you flagged in Step 1. Your inverter’s continuous rating must exceed your peak running load, and its surge rating must exceed your highest individual motor surge.
Size your inverter to your peak running load plus a 25 percent buffer to handle unexpected loads without tripping the unit.
There are two primary inverter types relevant to off-grid design:
| Inverter Type | Output Waveform | Best Application |
|---|---|---|
| Pure Sine Wave | Clean AC, identical to grid power | Sensitive electronics, motors, medical equipment |
| Modified Sine Wave | Stepped approximation | Basic resistive loads only (lights, simple heaters) |
For most full-time residential systems, a pure sine wave inverter is the only practical choice, since modern electronics, variable-speed motors, and HVAC equipment require clean AC power to operate correctly. Understanding this distinction is a core part of knowing how to design an off grid solar system that runs without constant equipment issues.
Sizing Your Charge Controller
Your charge controller sits between your solar array and your battery bank, and it must be rated to handle the maximum current your array can produce. There are two controller technologies to evaluate: PWM (Pulse Width Modulation) and MPPT (Maximum Power Point Tracking). MPPT controllers harvest 20 to 30 percent more energy from your panels by continuously optimizing the operating voltage, making them the standard choice for any system sized above 400 watts.
Use this formula to calculate the minimum MPPT controller amperage you need:
Controller Amps = Array Wattage (W) / Battery Bank Voltage (V)
For the example system from Step 4, with 1,600W of panels at 48V: 1,600 / 48 = 33.3 amps. Round up to the next standard controller size, which in this case is a 40-amp MPPT controller, and confirm the unit’s maximum input voltage exceeds your array’s open-circuit voltage before purchasing.
Step 6. Plan wiring, protection, and grounding
Wiring, protection, and grounding tie every component you’ve sized in the previous steps into a system that operates safely and consistently. Poor conductor sizing causes heat buildup and voltage drop that reduces your system’s real-world output, while missing overcurrent protection creates fire and shock hazards that no amount of quality equipment can compensate for. Every wire run, fuse, breaker, and ground connection must conform to the National Electrical Code (NEC) before your system can pass inspection.
Wire Sizing and Conductor Selection
Your wire gauge determines how much current a conductor can carry without overheating, and it must account for both the maximum continuous current of the circuit and the total length of the wire run. Longer runs increase resistance, which drops voltage and wastes power as heat. Size each conductor to carry 125 percent of the circuit’s maximum continuous current, which is the NEC’s baseline requirement for solar circuits, and verify your voltage drop stays within acceptable limits for each run.
Voltage drop should stay below 3 percent on any single circuit and below 5 percent total from array to load, or you’ll lose meaningful energy before it reaches your appliances.
Use this table to match current to copper conductor gauge:
| Max Current (A) | Minimum AWG | Typical Application |
|---|---|---|
| 15 | 14 AWG | Small branch circuits |
| 30 | 10 AWG | Charge controller output |
| 60 | 6 AWG | Battery interconnects |
| 100 | 3 AWG | Inverter battery cables |
| 150 | 1/0 AWG | Large inverter input |
Overcurrent Protection and Disconnects
Every circuit in your off-grid system needs a fuse or circuit breaker sized to protect the wire, not the load. Place overcurrent protection as close to the power source as possible on each circuit, including the positive lead leaving your battery bank, the output of your charge controller, and the input to your inverter. DC-rated fuses and breakers are not interchangeable with standard AC devices, so confirm that every protective device carries a DC voltage rating that matches or exceeds your system voltage before purchasing.
Install a manual disconnect switch between your battery bank and your inverter so you can isolate the system safely during maintenance or an emergency. Knowing how to design an off grid solar system that meets code means treating disconnects as a core design element, not an afterthought added during final installation.
Grounding and Bonding
Your system requires both equipment grounding and DC system grounding completed before you energize any component. Connect the metal chassis of every device, including your inverter, charge controller, and battery enclosure, to a single grounding electrode conductor that runs to a ground rod driven at least eight feet into the earth. Bond your negative DC bus to the system ground at one point only to prevent ground loops that introduce noise and accelerate corrosion across your wiring and terminal connections.
Step 7. Add backup power for bad weather
Sunny days are easy. The challenge in how to design an off grid solar system for a real-world residence is keeping the lights on through a week of overcast skies, a tropical storm, or a hurricane that parks over your region for days. Your solar array produces nothing useful under heavy cloud cover, and even a well-sized battery bank will drain if the sun stays hidden long enough. A backup generator bridges that gap and protects your system from running into deep discharge conditions that shorten battery life and cut power to critical loads.
Selecting a Backup Generator
Your generator needs to do two things: recharge your battery bank and power essential loads simultaneously, often through your inverter-charger. To size it correctly, take your inverter’s AC input charging current, multiply it by your battery bank voltage, and compare that figure to the generator’s rated output in watts. Your generator’s output should comfortably exceed the combined draw of your charging load and any loads you plan to run concurrently during an outage.
A generator sized at roughly 1.5 times your inverter-charger’s maximum AC input demand leaves enough headroom to run critical appliances while charging without overloading the unit.
For most residential off-grid systems built around a 48V battery bank, a 5,000 to 8,000-watt propane or natural gas generator is a practical range. Propane is the preferred fuel choice in Florida because it stores indefinitely without degrading, unlike gasoline, which breaks down over 30 to 90 days and clogs carburetors in standby generators that sit unused between storm seasons.
Integrating the Generator with Your System
Most modern inverter-chargers, including units from Victron Energy and Schneider Electric, include an automatic generator start (AGS) function that monitors your battery’s state of charge and starts the generator when reserves fall below a threshold you define during commissioning. Set your AGS trigger point at 40 to 50 percent state of charge for lithium iron phosphate batteries, which gives the generator enough runtime to meaningfully recharge the bank before it shuts off automatically.
Wire the generator’s AC output to the AC input of your inverter-charger through a properly rated transfer switch that physically disconnects the generator from your system when not in use. This prevents backfeed and meets NEC requirements for generator integration in off-grid installations.
Sizing Your Backup Fuel Supply
Calculate your expected generator runtime per charge cycle by dividing your usable battery capacity in kilowatt-hours by your generator’s effective charging rate. Multiply that runtime by your generator’s fuel consumption at the load level you plan to run it. For a system in a hurricane-prone area, store enough fuel for at least five full charge cycles to cover extended periods of poor solar production without resupply.
Step 8. Plan installation, commissioning, and upkeep
Designing a system on paper and putting it into operation are two separate tasks, and the sequence you follow during physical installation directly affects both safety and long-term performance. Before you mount a single panel or connect a terminal, confirm that your permit applications are approved and that your inspection schedule is in place. In Florida, off-grid installations require building and electrical permits regardless of whether the system connects to the utility grid.
Install Components in the Right Sequence
Start with your mounting structure and racking, then move to panel installation before running any DC wiring into the building. Work from the array toward the battery bank, not the other direction. Connect your charge controller to the battery bank first, then connect the array to the charge controller. Never connect the array directly to an open charge controller input without the battery bank already attached, as the unregulated voltage can damage the controller instantly. Connect your inverter last, after all DC wiring is complete and overcurrent protection is in place.
Following the manufacturer’s wiring sequence for your specific inverter-charger model is not optional. Deviating from it voids warranties and creates real safety hazards.
Commission Your System Before Relying on It
Once all components are wired, run through a structured commissioning checklist before you transfer any critical loads to the system. Verify every connection is torqued to spec, confirm your battery management system (BMS) reads the correct state of charge, and test each circuit individually before energizing the full system. Use a clamp meter to confirm that current readings on each circuit match your design calculations from earlier steps.
Run the system under full load for at least 24 to 48 hours before treating it as your primary power source. During this period, confirm that your charge controller cycles correctly, your inverter handles surge loads without tripping, and your automatic generator start triggers at the threshold you configured.
Schedule Preventive Maintenance
Knowing how to design an off grid solar system gets you to a working installation, but consistent maintenance is what keeps it running reliably for 20 or more years. At a minimum, perform these tasks on a regular schedule:
- Monthly: Check battery terminal connections for corrosion and verify state of charge readings
- Quarterly: Clean panel surfaces and inspect wiring for abrasion or UV degradation
- Annually: Test your generator under load, inspect mounting hardware for rust or loosening, and review your charge controller logs for error codes or efficiency drops
Next steps
You now have a complete framework for how to design an off grid solar system that actually holds up under real-world conditions. From calculating your daily load and sizing your battery bank to selecting your inverter and planning your wiring, every step in this guide builds on the one before it. Skipping steps or guessing at inputs is what turns a promising design into a system that underdelivers the first time clouds roll in for a week.
Putting this into practice takes more than a spreadsheet. A certified solar engineer reviews your specific site conditions, confirms your component selections, and catches compatibility issues before you spend money on equipment that won’t work together. At Advance Solar & Spa, our team has handled over 50,000 installations across Florida since 1983, and we bring that experience to every system we design. Get a free solar consultation and let us help you build a system sized right for your home from day one.