Every solar installation in Florida requires permits before a single panel goes on your roof. That’s not optional, it’s the law. And if you’ve never dealt with solar permitting services before, the process can stall your project by weeks or even months. Between structural reviews, electrical diagrams, utility interconnection agreements, and local building department requirements, there’s a lot of paperwork standing between you and lower energy bills.
At Advance Solar & Spa, we’ve handled permitting across Florida’s East and West coasts for over 40 years and more than 50,000 installations. We’ve seen firsthand how a single missing document or an incorrect plan set can derail a timeline. Our in-house engineering and design team manages the entire permitting process so homeowners and business owners don’t have to.
This guide breaks down exactly how solar permitting works, what causes the most common delays, and step-by-step actions you can take to get approved faster. Whether you’re planning a residential rooftop system or a commercial installation, you’ll walk away with a clear understanding of the process and what to expect at each stage.
What solar permitting services include
A professional solar permitting service handles everything between your signed contract and your first day of solar production. That means site analysis, engineering documentation, government submissions, and utility coordination, all managed by specialists who know what each local jurisdiction expects. Without this layer of expertise, you’re likely to face rejected applications, costly revisions, and scheduling delays that push your install date back by weeks.
Engineering and Design Documentation
The foundation of any permit application is a complete plan set, which is a formal packet of documents that describes your system in precise technical detail. This includes a site plan showing panel placement on your roof, electrical diagrams, a single-line drawing of the system’s wiring, and structural calculations that confirm your roof can bear the added load. Most jurisdictions in Florida require drawings stamped by a licensed engineer, so your solar contractor must have an in-house engineer or a certified third party who can sign off on the documents.
Your plan set is built around your specific property. Roof pitch, shading conditions, panel model, inverter type, and mounting hardware all affect what goes into the documentation. A generic or recycled plan set won’t pass review at most building departments, so every detail needs to be accurate before anything gets submitted.
An incomplete or inaccurate plan set is the single most common reason permit applications get rejected on the first review.
AHJ and Utility Coordination
AHJ stands for Authority Having Jurisdiction, which is typically your local building department or county office. Every AHJ has its own forms, submittal requirements, and review timelines. Some Florida counties accept digital submissions through online portals, while others still require in-person paper filings. Knowing the difference, and having the right checklist for each office, is a core part of what solar permitting services handle for you.

Your contractor also files a separate interconnection application with your utility company. Utilities like FPL and Duke Energy have their own review processes. Your contractor submits system specifications, single-line diagrams, and a net metering agreement request as part of this application. Both tracks, the AHJ and the utility, need to run in parallel so neither one creates a bottleneck for the other.
| Document | Submitted To | Purpose |
|---|---|---|
| Stamped plan set | Local AHJ | Structural and electrical approval |
| Single-line diagram | Utility company | Interconnection review |
| Net metering application | Utility company | Rate plan enrollment |
| Interconnection agreement | Utility company | Legal authorization to connect |
Corrections and Re-Submissions
Plan check corrections are common, and they do not mean your project has failed. Building departments frequently return applications with questions or requests for additional detail. A qualified permitting team tracks these responses and addresses each correction point systematically before resubmitting, so your timeline stays as tight as possible.
Speed matters here. The faster your contractor turns around a correction response, the less time your project sits in the queue. This is why working with an experienced in-house team, rather than a third-party permitting vendor who may juggle hundreds of unrelated projects, tends to produce faster results for homeowners and commercial property owners alike.
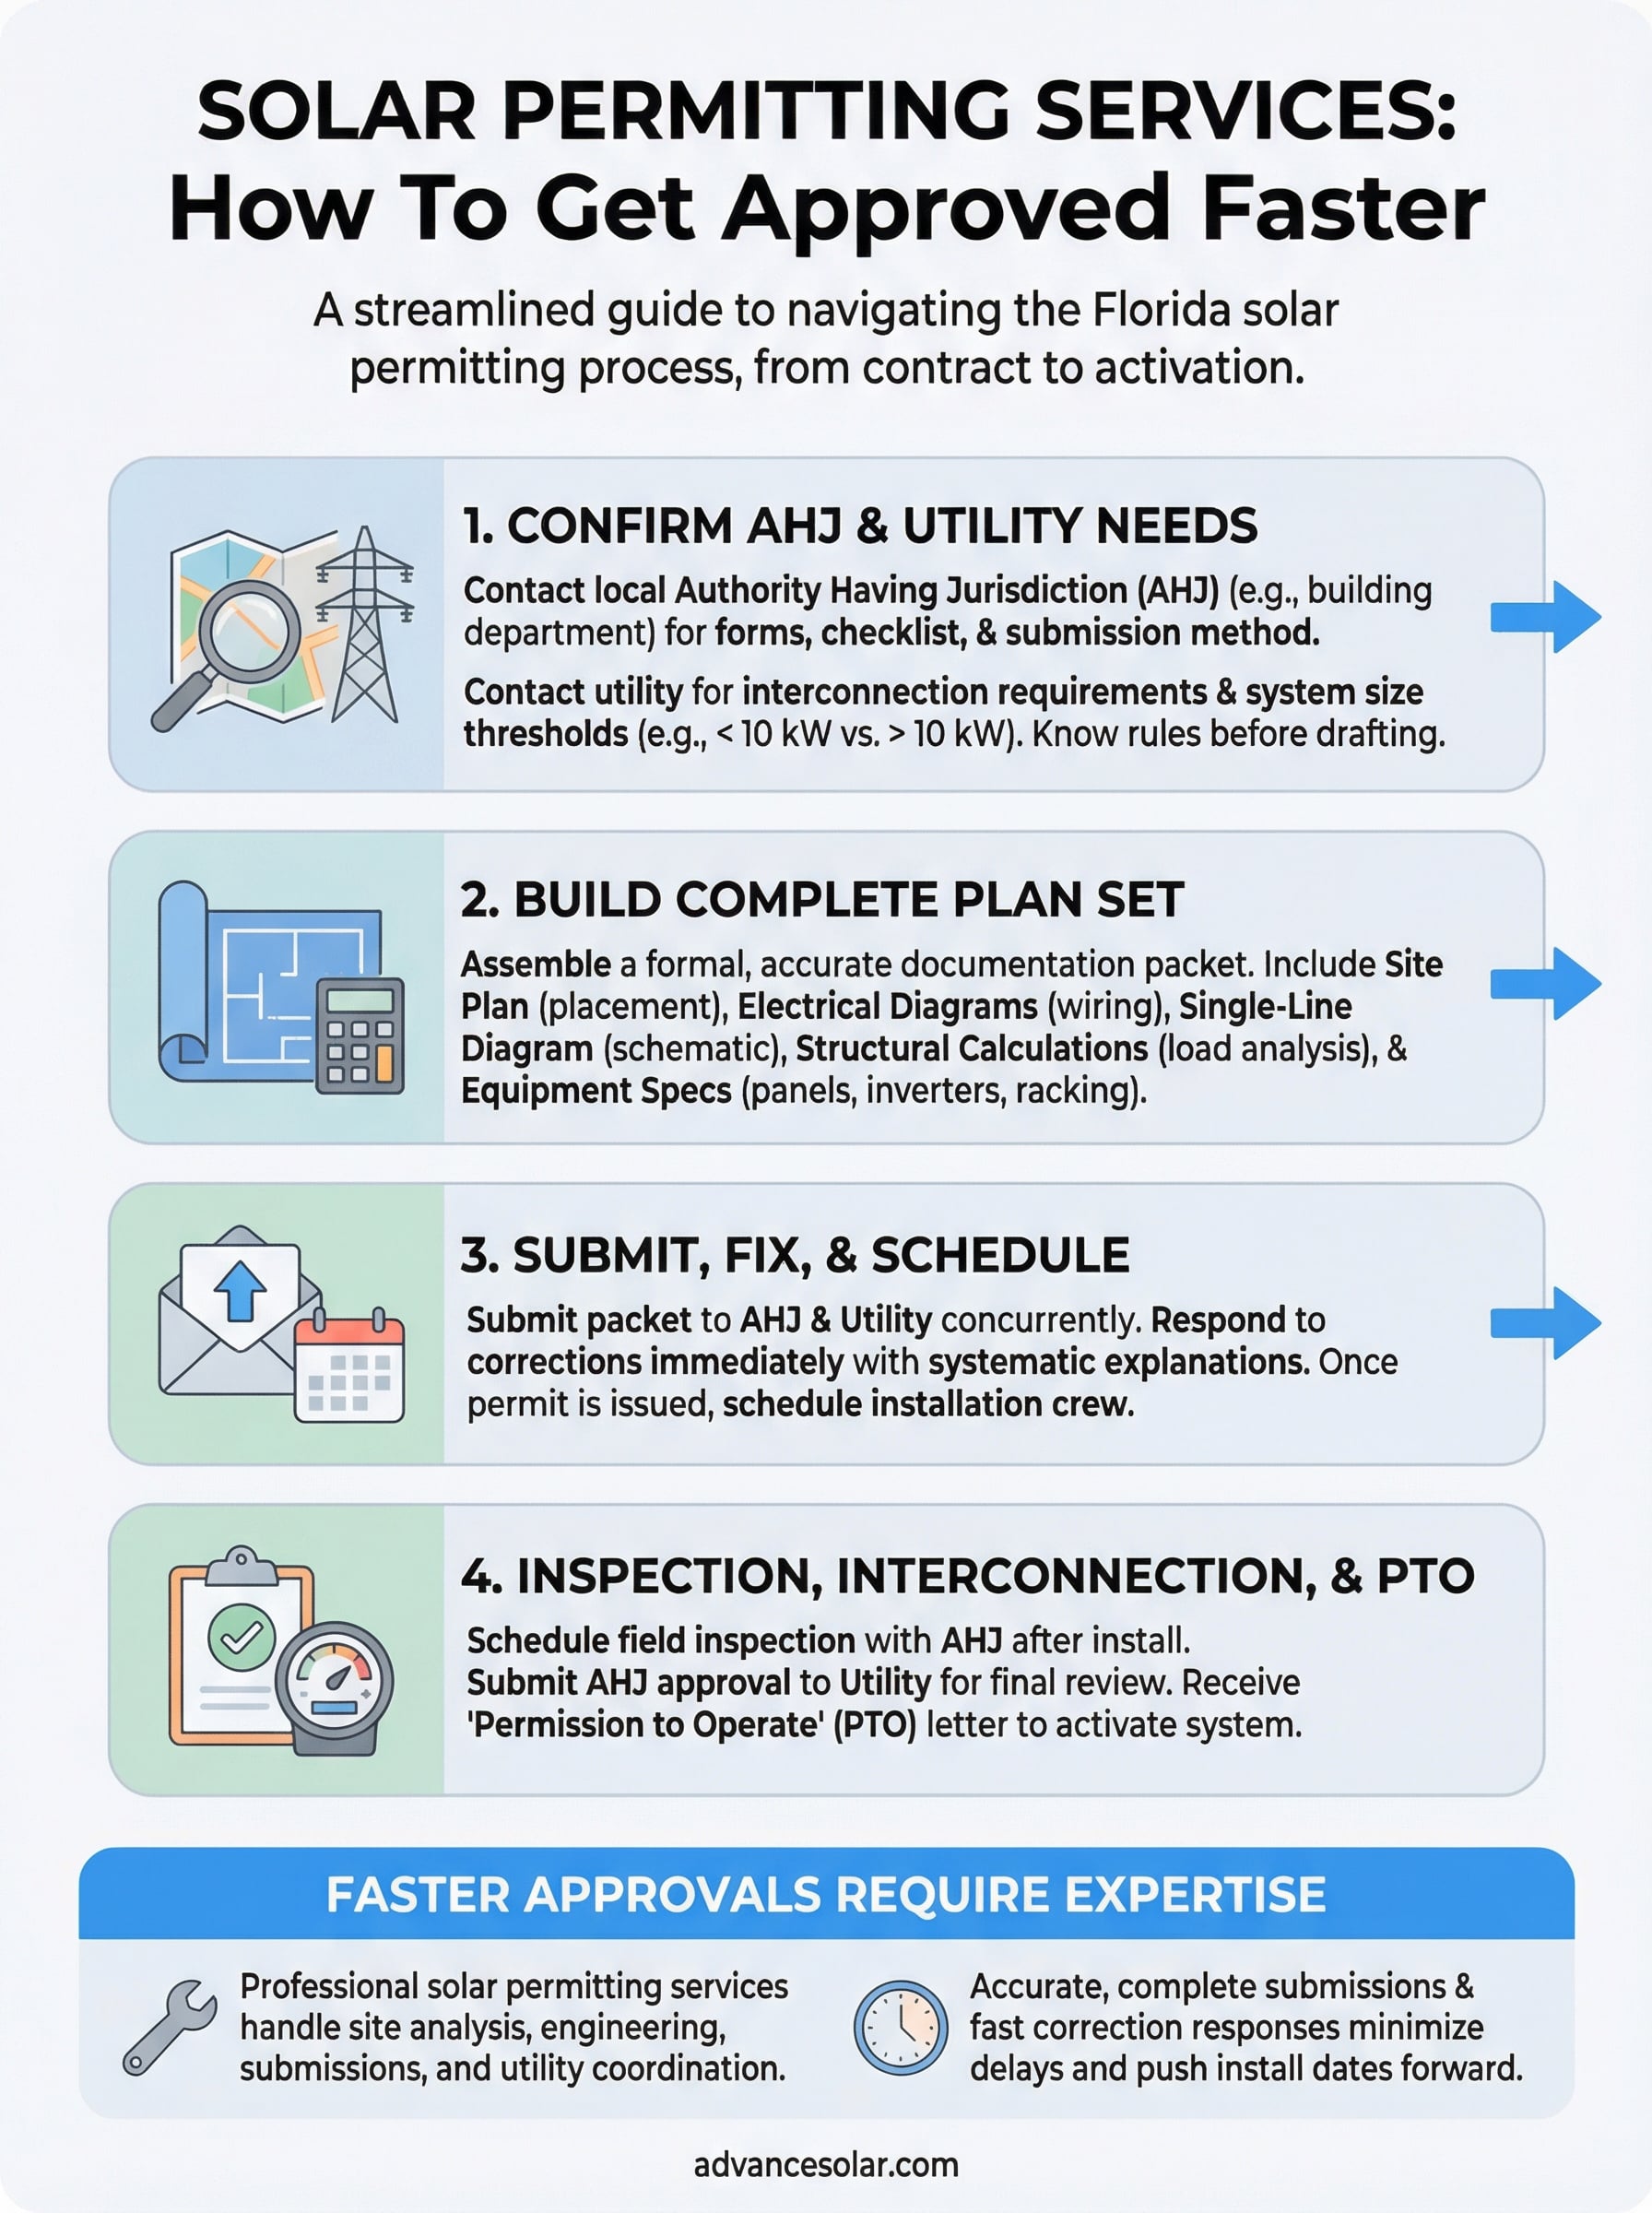
Step 1. Confirm AHJ rules and utility needs
Before your contractor drafts a single page of your plan set, someone needs to confirm the exact rules that govern your project. Your local AHJ and your utility company each have their own requirements, and those requirements can differ significantly from one county to the next in Florida. Skipping this step is how projects get rejected on the first submission.
Find Your AHJ Contact Information
Your AHJ is usually your county or city building department. You can locate it by searching "[your county] building department solar permit requirements" through a standard web search. Once you find the right office, call or email directly to confirm three things: the current permit application form, the documentation checklist, and the preferred submission method (online portal, email, or in-person). Some Florida counties update their requirements annually, so checking directly beats relying on outdated information.
Confirm whether your jurisdiction requires a stamped engineering plan set, since not all Florida counties have the same threshold for when a licensed engineer’s signature is mandatory.
Use this checklist when you contact your AHJ:
- Application form (current version and revision date)
- Required documentation list (plan set, load calculations, equipment specs)
- Submission method (portal name, email address, or physical address)
- Current review turnaround time
- Correction response window before the application expires
Check Utility Interconnection Requirements
Contact your utility’s interconnection department to confirm system size thresholds, required forms, and estimated review timeline. For most Florida homeowners, that means reaching out to FPL, Duke Energy, or TECO depending on your service area. Both your AHJ approval and your utility interconnection approval need to come through before your system can legally connect to the grid.
Ask specifically whether your system qualifies under the standard interconnection process or a more involved technical review. Systems above 10 kW often require additional documentation. Getting this information upfront helps your solar permitting services team prepare a complete submission from the start, rather than scrambling to add documents after a rejection.
Step 2. Build a complete plan set
Once you’ve confirmed what your AHJ and utility require, your contractor assembles the plan set, which is the full documentation package submitted for review. Every page in this packet needs to reflect your actual system, not a template that was used on a different property. A well-built plan set answers every question a reviewer might ask before they ask it, which keeps corrections to a minimum and speeds up approval.
Gather the documents your reviewer expects
Your plan set typically contains several distinct components, and missing even one can trigger a correction notice. Your solar permitting services team will compile these from your site assessment data, equipment specs, and structural analysis. Here’s what most Florida jurisdictions require:

- Site plan: Overhead view of your property showing panel placement, roof sections, setbacks, and compass orientation
- Electrical diagram: Full wiring layout from panels to inverter to main panel, including wire gauges and conduit paths
- Single-line diagram: Simplified schematic showing system components and how they connect
- Structural calculations: Load analysis confirming your roof framing can support the added weight of the array
- Equipment spec sheets: Manufacturer data sheets for panels, inverters, racking, and any battery storage components
- Placard or labeling diagram: Shows where required safety labels will be placed on the system
An AHJ reviewer is checking for code compliance, so your documents need to reference the applicable code versions (such as NEC 2020 or 2023) that your county has adopted.
Format the packet to match local standards
Different counties in Florida have different formatting preferences for how a plan set is organized and submitted. Some require a specific cover sheet with your permit number, contractor license, and property address printed at the top. Others want documents in a particular page order or submitted as separate PDF files rather than a single combined document.
Ask your building department for a sample submittal checklist and match your packet to it exactly. When your documentation mirrors what the reviewer expects to see, your application moves through the queue faster.
Step 3. Submit, fix corrections, and schedule install
With your plan set finalized, you’re ready to submit. Whether your AHJ accepts online submissions or requires in-person filings, send everything in one complete packet. An incomplete submission doesn’t pause the review queue, it restarts your position in it, and that delay adds days or weeks to your project timeline.
Submit your application
Send your documentation packet through your AHJ’s required channel and immediately save your confirmation number or submission receipt. On the same day, send your utility interconnection application with the supporting documents you confirmed in Step 1. Both tracks need to move at the same time so neither one creates a bottleneck for the other.
After submission, track your application status using your AHJ’s online portal if one is available. Note the expected review window your building department gave you, then set a calendar reminder to follow up if you haven’t received a response three to five business days before that deadline.
Respond to corrections fast
Most first-time submissions come back with at least one correction notice. Your solar permitting services team should review the correction list the moment it arrives and sort each item by how long it will take to resolve. Some corrections, like a missing label on a diagram, take minutes to fix. Others, like updated structural calculations, may take a full day or two.
The faster you respond to a correction notice, the sooner your application re-enters the review queue, so treat every correction as urgent.
Send your revised documents with a correction response letter that addresses each flagged item by number, explains the change made, and references the exact page where the reviewer can find the update. This format lets the reviewer confirm your fixes quickly without searching through the entire packet.
Schedule your install date
Once your building permit is issued, contact your installation crew immediately to lock in a date. Most crews book out one to three weeks, so don’t wait until every approval is finalized before you start coordinating. Reach out as soon as your permit clears so you can confirm:
- Your installation crew’s availability
- Equipment delivery lead time
- Site access requirements for inspection day
Step 4. Inspection, interconnection, and PTO
Your installation is complete, but the system can’t turn on yet. Before your solar array produces a single kilowatt-hour, you need to clear two final approval gates: a field inspection from your local AHJ and a Permission to Operate (PTO) letter from your utility company. Your solar permitting services team should be coordinating both tracks simultaneously as your install crew wraps up work on-site.
Schedule and pass the field inspection
Contact your building department to schedule the field inspection as soon as your installation is finished. Inspectors check that the physical installation matches the approved plan set exactly, so nothing should be modified from what was submitted without first filing a revision.
Before the inspector arrives, walk through your system with this checklist to catch common issues:
- All required safety labels and placards are installed in the correct locations
- Conduit runs match the routes shown in the electrical diagram
- The main panel disconnect and breaker are labeled correctly
- No exposed wiring or unsealed conduit penetrations on the roof or exterior walls
- Inverter and meter locations match the approved site plan
If your inspector finds a discrepancy, they will issue a correction notice and schedule a re-inspection, which adds days to your timeline, so verify every detail before they show up.
Finalize utility interconnection and get PTO
Once your AHJ issues final inspection sign-off, send that approval documentation to your utility company right away. The utility uses that sign-off to confirm the physical installation is code-compliant before they authorize the grid connection. After their internal review, a utility technician may visit your property to install or update your net meter.
Your PTO letter arrives after the meter work is complete. That letter is your formal authorization to activate the system. Keep a copy with your installation records, as you’ll need it for warranty claims, insurance documentation, and any future property sale disclosures. Once PTO is in hand, your system is ready to switch on.
Bring your system online
Your PTO letter marks the end of the permitting process and the start of real savings. At this point, every approval is in place and your system is ready to generate power. Flip the switch, confirm your inverter is producing, and check your monitoring app to verify output matches what your installer projected.
From here, keep your permit documents, inspection sign-offs, and PTO letter in one organized folder, either digital or physical. You’ll reference these records for insurance updates, tax credit documentation, and any future property sale. Working with a professional solar permitting services team from day one is what makes this moment arrive on schedule rather than weeks behind where it should be.
Ready to stop waiting and start producing? Contact Advance Solar & Spa to speak with a certified solar consultant who handles every step of the permitting and installation process in-house, from your first site visit to your final PTO letter.