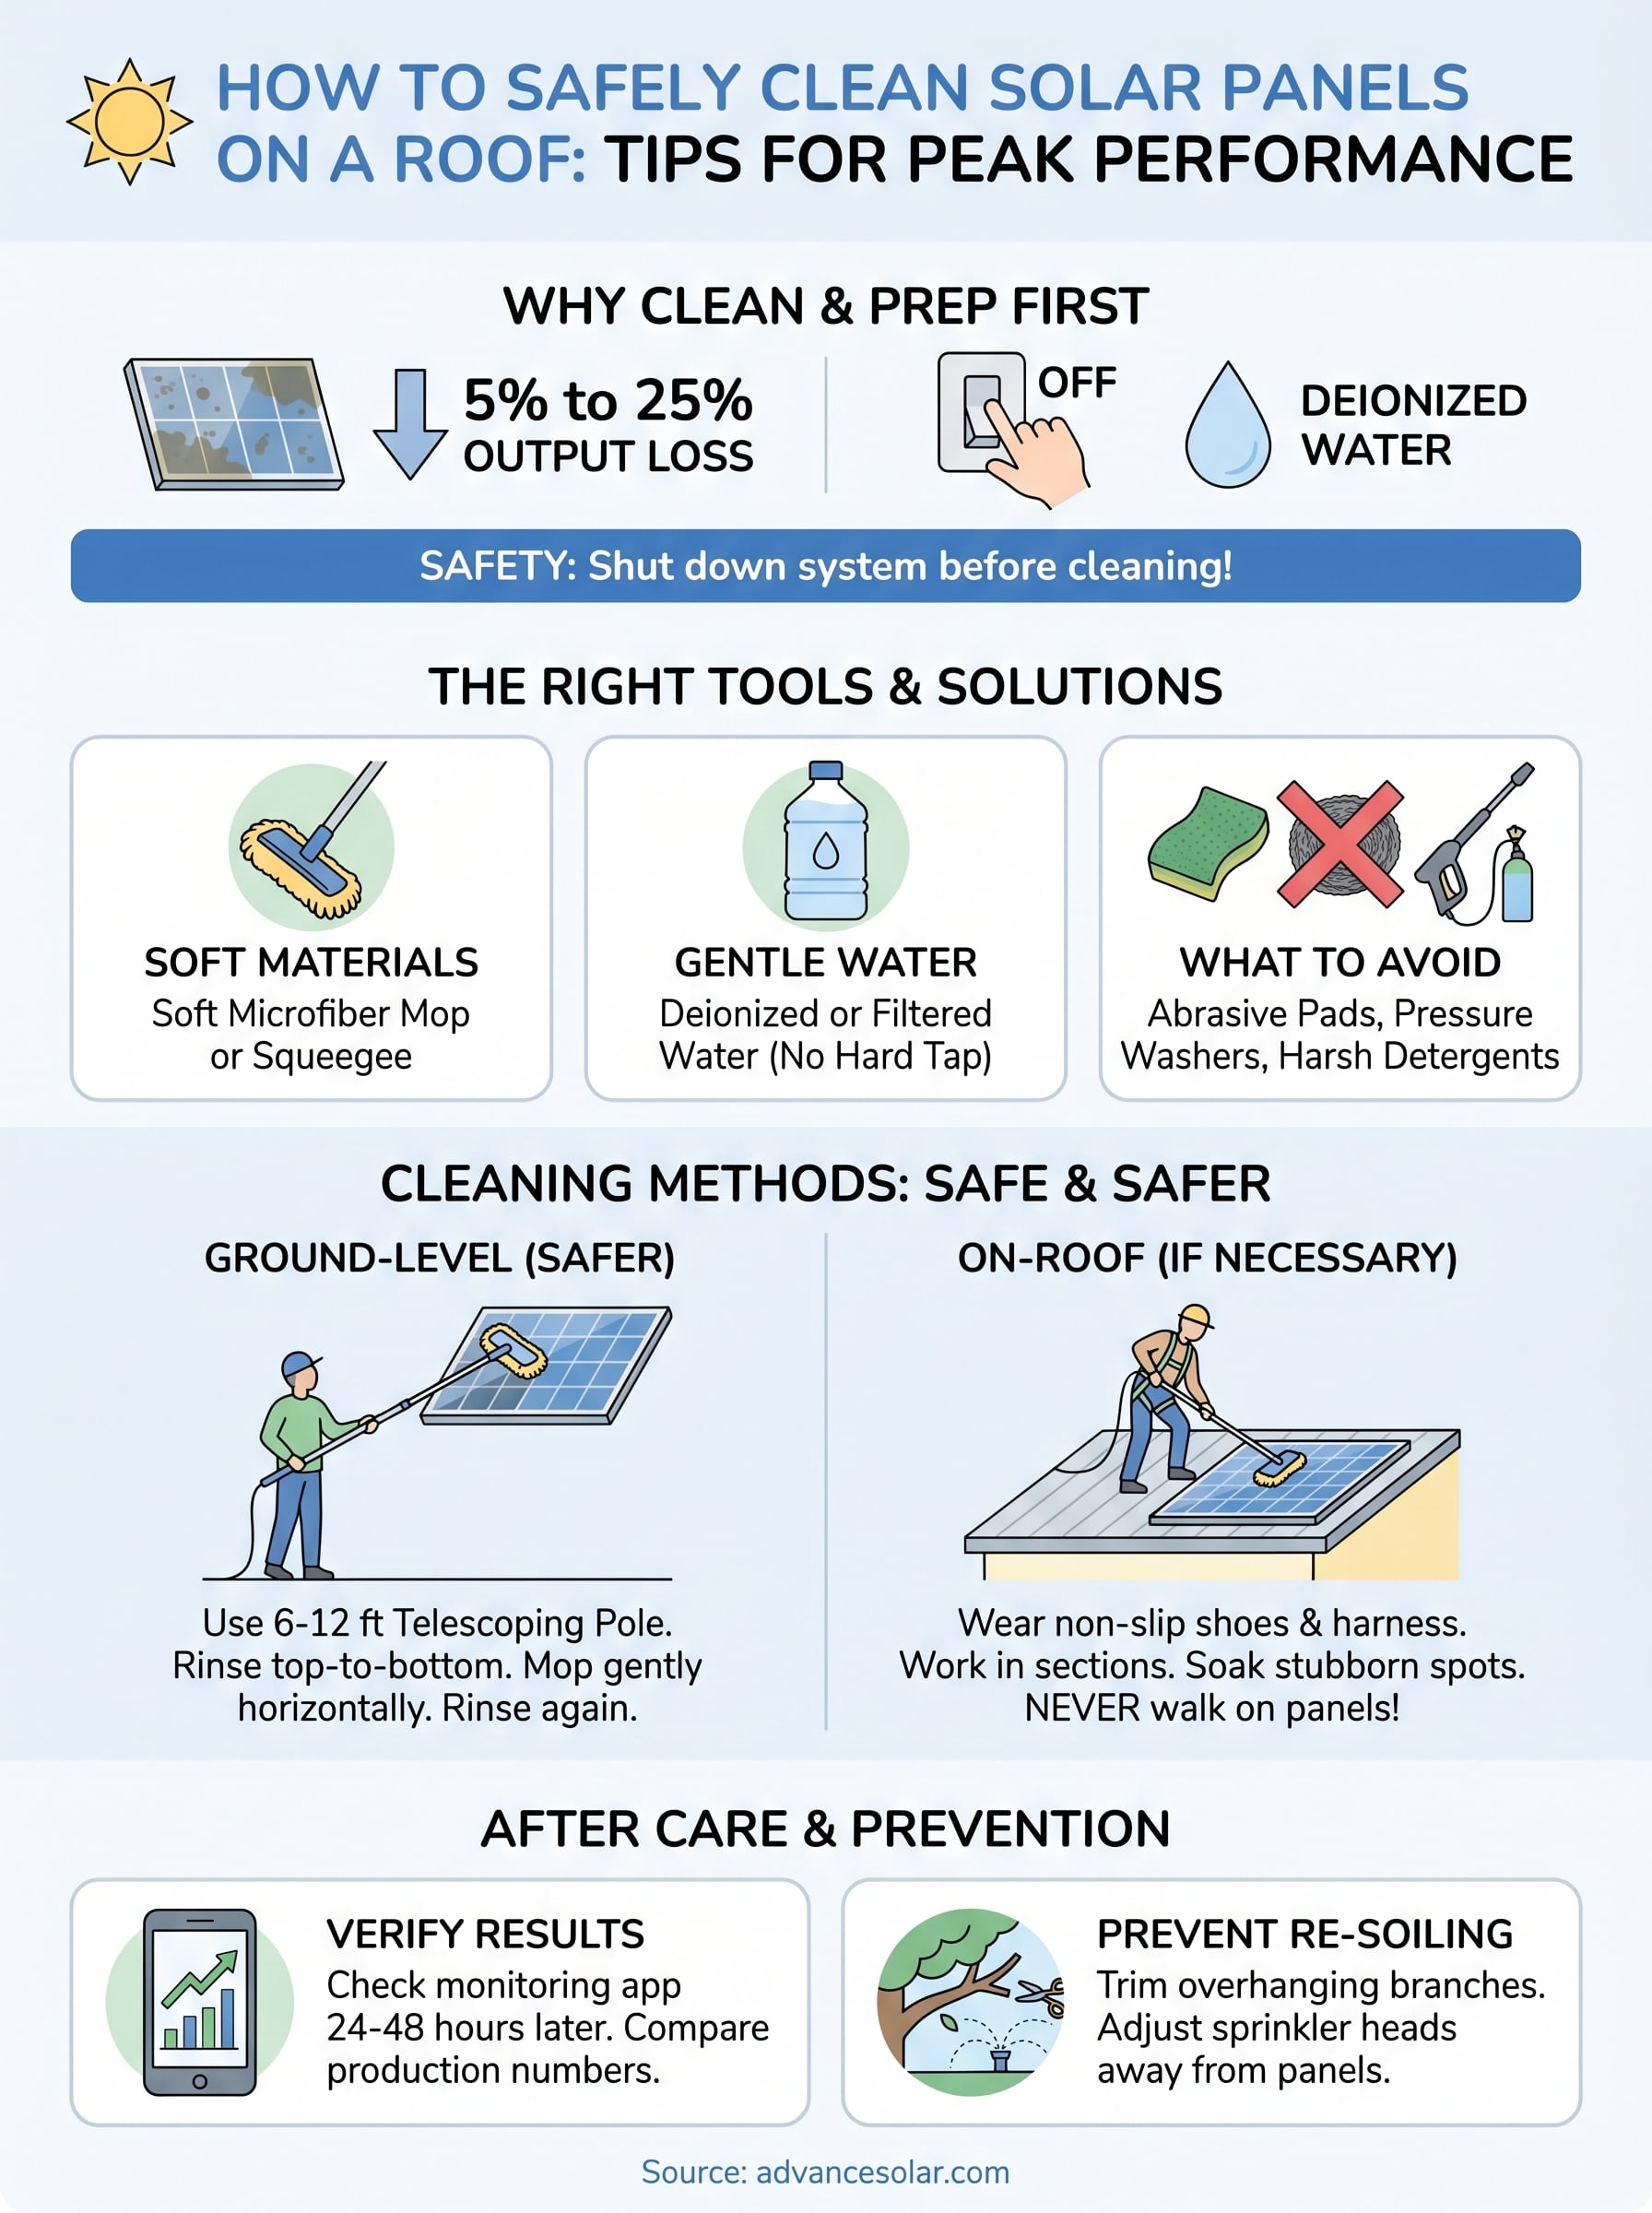
Dirty solar panels can lose 5% to 25% of their energy output depending on how much grime, pollen, and bird droppings have built up on the surface. If you’ve noticed your system underperforming, especially during Florida’s pollen-heavy spring months, a good cleaning might be all it takes to get your production numbers back up. But figuring out how to clean solar panels on a roof safely, without scratching the glass or risking a fall, isn’t as straightforward as grabbing a garden hose and climbing a ladder.
At Advance Solar & Spa, we’ve installed and maintained over 50,000 solar systems across Florida since 1983. Our service team handles panel cleanings regularly, and we see firsthand what works, and what causes damage. Hard water, abrasive sponges, and pressure washers are some of the most common mistakes homeowners make, and they can lead to micro-scratches that permanently reduce efficiency.
This guide breaks down the safest tools, cleaning solutions, and step-by-step methods to clean your rooftop panels without damaging them or voiding your warranty. We’ll also cover when it makes sense to DIY versus calling in a professional, and how to tell if your panels actually need cleaning in the first place. Whether you’re maintaining a system we installed or one from another provider, these tips will help you protect your investment and maximize your energy production.
Before you start: safety, tools, and prep
Rushing up a ladder with a bucket of tap water is one of the fastest ways to hurt yourself or damage your panels. Before you learn how to clean solar panels on a roof, understand that preparation prevents accidents, and the wrong supplies can cause more harm than the dirt itself. Taking 15 minutes to gather the right gear and plan your approach will save you money and keep you safe.
Safety first: protect yourself before you protect your panels
Working on or near a roof carries real risk, even on a single-story home. Non-slip footwear and a properly secured ladder are non-negotiable starting points. If your panels sit on a steep pitch or a two-story roof, skip the roof access entirely and use a ground-level cleaning method instead (covered in Step 2). Most panel damage and nearly all cleaning-related injuries happen because someone skipped the setup.
Never clean your solar panels while they are energized under direct sunlight; always clean them in the early morning, late afternoon, or on a cloudy day to reduce thermal shock and electrical risk.
Your next safety step is to shut down your solar system before introducing any water near the wiring. Follow the shutdown procedure in your inverter manual. For Enphase and Tesla Energy systems, this means switching the system to "off" through the app or the physical shutoff switch before you start.
The right tools and cleaning solutions
Using the wrong tools is the most common mistake homeowners make. Abrasive sponges, steel wool, and high-pressure washers will scratch the anti-reflective coating on the glass, permanently reducing how much light the cells absorb. Stick to soft materials and gentle water pressure to protect the surface.
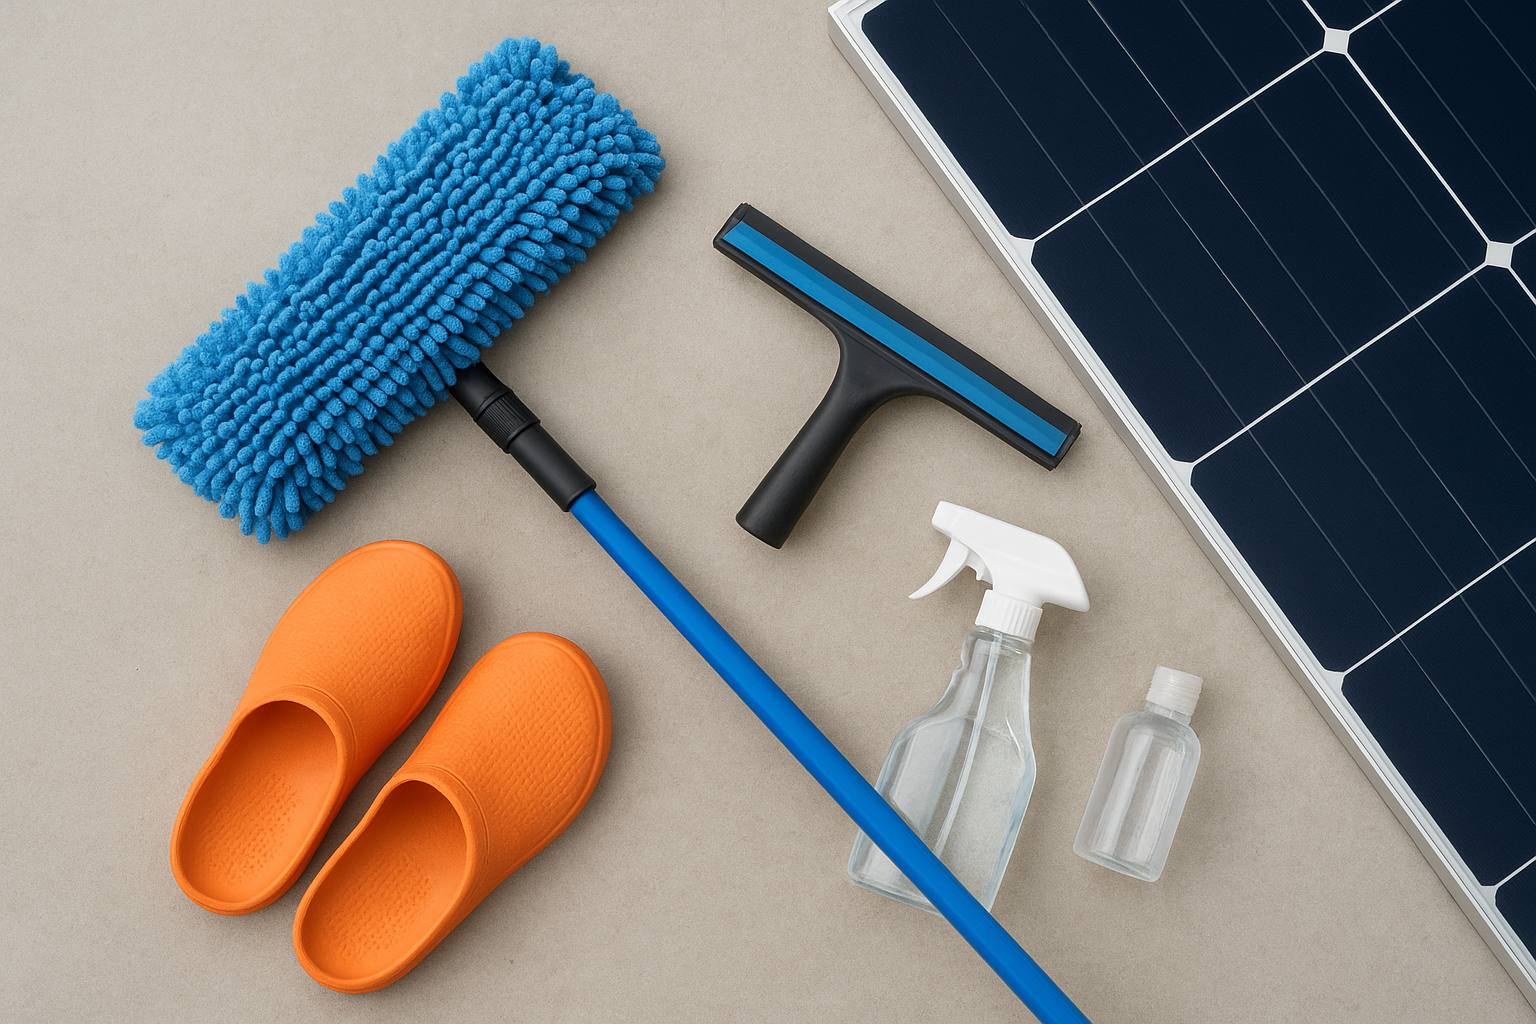
Here’s what you need:
| Tool / Supply | Recommended Option | What to Avoid |
|---|---|---|
| Water | Deionized or filtered water | Hard tap water (leaves mineral deposits) |
| Cleaning head | Soft microfiber mop or squeegee | Abrasive scrub pads |
| Soap (if needed) | A few drops of plain dish soap | Detergents with bleach or solvents |
| Extension pole | Telescoping pole, 6 to 12 feet | Rigid poles that are hard to control |
| Safety gear | Non-slip shoes, safety harness | Sandals or bare feet |
Prep steps before you touch the panels
Before you start, pull up your panel warranty documentation and confirm that DIY cleaning is permitted and which methods are approved. Some manufacturers void the warranty if you use anything other than plain water. Also open your monitoring app or inverter dashboard and record your current production output so you can compare it after cleaning and confirm the job made a measurable difference.
Remove loose debris like leaves or twigs with a dry soft brush before introducing any water. Wet debris is harder to remove and can scratch the glass surface as you drag it across the panel face.
Step 1. Decide if your panels need cleaning
Cleaning panels that don’t need it wastes your time and introduces unnecessary risk. Before you figure out how to clean solar panels on a roof, check whether cleaning will actually make a measurable difference. Light dust and light rain typically handle themselves, but certain Florida conditions like heavy pollen seasons, bird activity near the panels, or months without significant rainfall can cause real efficiency losses.
How to read your monitoring data
Your inverter or monitoring app is the fastest way to confirm whether dirty panels are costing you energy. Enphase Enlighten and Tesla app dashboards both show daily and monthly production data that you can compare against historical averages or your installer’s estimates. If your system is producing 10% or more below expected output on a clear sunny day, dirty panels are a likely culprit.
Run through this checklist before you grab your cleaning supplies:
- Compare today’s production against the same period last year in your monitoring app
- Rule out shading from new tree growth or nearby structures
- Confirm your inverter shows no error codes or fault conditions
- Check local weather history to see when significant rain last occurred
Visual signs that cleaning is overdue
A quick ground-level look tells you a lot before you commit to any roof work. Bird droppings, thick pollen layers, and visible dirt streaks don’t wash off with light rain the way thin dust does, and they signal that your panels need hands-on attention. Pay close attention to the bottom edge of each panel, where debris collects and stays wet the longest.
A single panel heavily coated in bird droppings can drag down the output of an entire string, making spot cleaning sometimes more urgent than a full cleaning session.
Partial fouling is just as important to catch as full-panel grime. Localized heavy soiling from a single bird or a fallen branch matters more than an even film of dust, since shading even a small section of a panel can significantly cut that panel’s total output.
Step 2. Clean panels safely from the ground
Ground-level cleaning works for most residential rooftop installations and removes the biggest safety risk entirely. If your panels sit at a pitch you can reach with a telescoping pole, this is the right method for learning how to clean solar panels on a roof without ever stepping onto the surface. You’ll get the job done cleanly and keep yourself off a ladder.
Set up your telescoping pole correctly
A 6 to 12-foot telescoping extension pole fitted with a soft microfiber mop head gives you enough reach for most single-story and many two-story installations. Thread the mop head onto the pole fitting and lock it at a slight angle so the cleaning surface lies flat against the panel glass when you extend the pole upward. Test the angle on the ground first by mimicking the motion you’ll use before pointing it at your panels.
Never attach a hard scrub brush or abrasive pad to a telescoping pole thinking the extra reach justifies a rougher cleaning head. The pressure you apply from below is harder to control, and a scratch made 10 feet up costs just as much as one made by hand.
Apply water and work in sections
Start by rinsing each panel with a steady, low-pressure stream from a garden hose fitted with a gentle spray nozzle. Work from top to bottom so dirt flows off the lower edge rather than pooling mid-panel. Once the surface is wet, use your mop head to make slow horizontal passes across the glass, applying light, even pressure without scrubbing.
Follow this sequence for each panel:
- Rinse top to bottom with plain water
- Mop across the panel with slow horizontal passes
- Rinse again to clear any loosened grime
- Let the panel air dry or follow with a squeegee pass if streaking appears
Move across your array one panel at a time rather than wetting all panels at once, especially in direct sun where water evaporates quickly and leaves mineral spots.
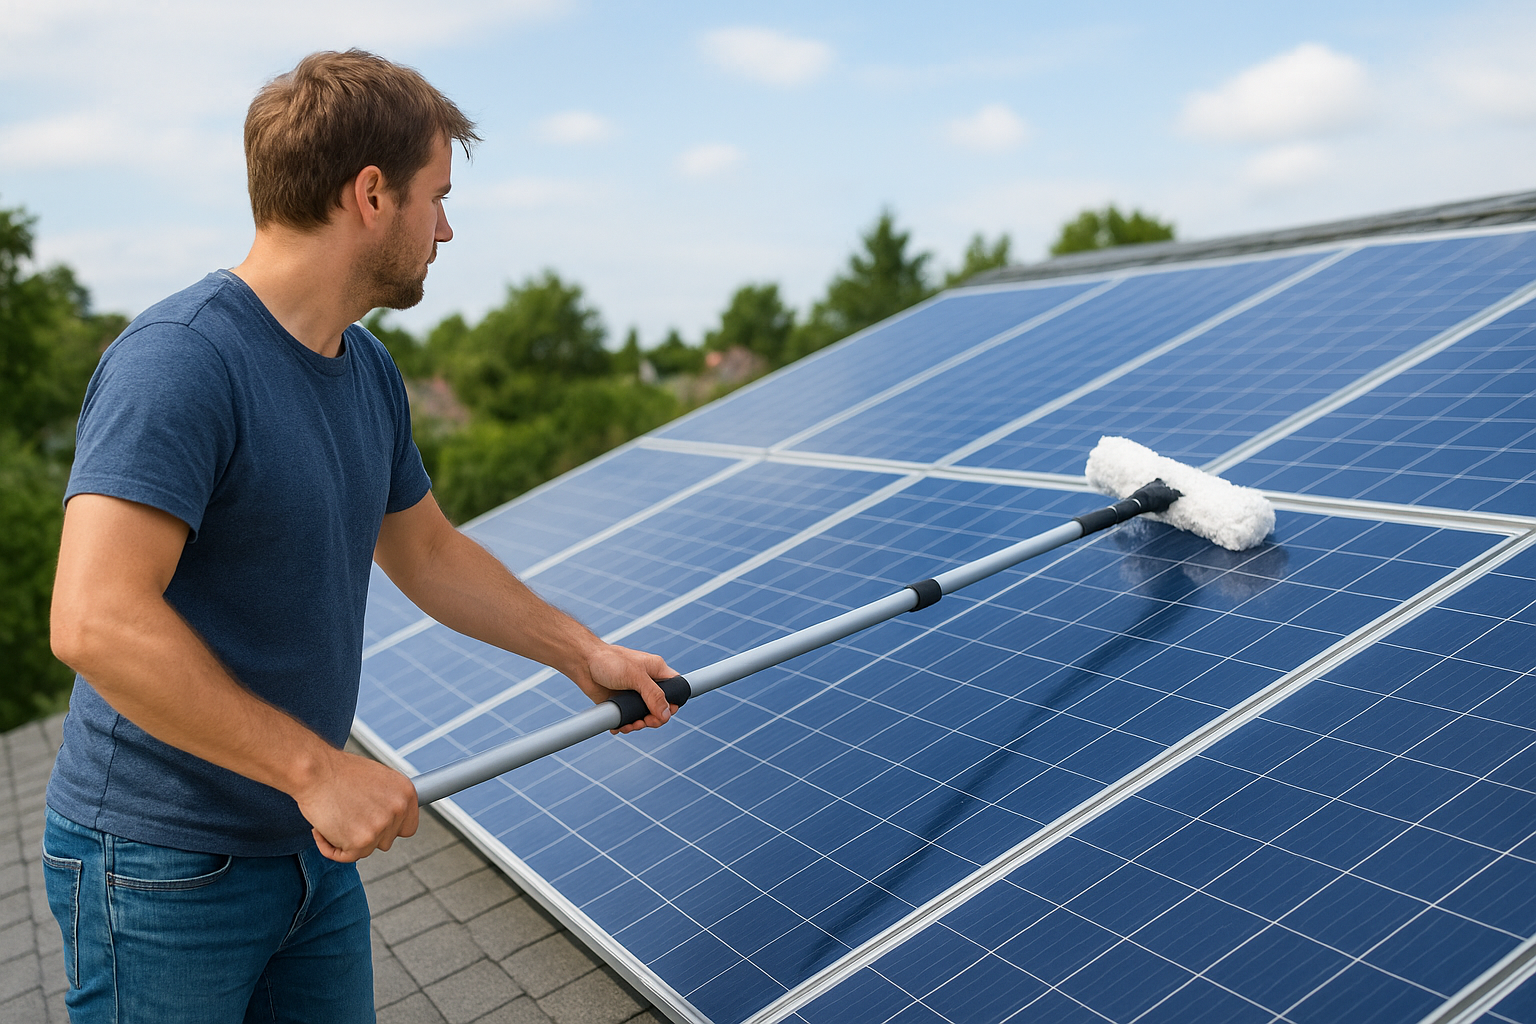
Step 3. Clean panels on the roof when you must
Sometimes ground-level cleaning isn’t enough. Heavy bird dropping buildup, mineral crust from hard water, or panels mounted on a flat roof with no pitch may require you to work directly on the surface. Knowing how to clean solar panels on a roof safely when you step onto it is just as important as the cleaning technique itself.
Gear up before you step on the roof
Only go up if your roof pitch is low enough to stand on without sliding, and if you have a second person on the ground to monitor your safety and hold the base of the ladder. Put on non-slip rubber-soled shoes and attach a safety harness anchored to a ridge line whenever the roof pitch makes footing uncertain, even slightly. Bring all your supplies up in one trip using a bucket with a handle so both hands stay free while you move.
Never walk directly on the panels themselves; step only on the mounting rails or the roof surface around them to avoid cracking the cells beneath the glass.
Work safely across the panel surface
Once you’re positioned safely on the roof, follow the same top-to-bottom rinsing sequence you would use from the ground, but work in smaller sections since controlling water flow is harder at close range. Use your soft microfiber mop head attached to a short handle rather than a long pole, and apply slow, horizontal passes with light pressure. Scrubbing harder does not remove stubborn deposits faster; it only increases the chance of micro-scratching the glass.
For stubborn spots like dried bird droppings or mineral scale, soak the area for two to three minutes with plain water or a diluted dish soap solution before wiping. Let the water do the work of loosening the deposit before your mop head makes contact. Finish each panel with a clean water rinse and move to the next one before the surface dries.
After cleaning: verify results and avoid re-soiling
Once you finish learning how to clean solar panels on a roof and do the actual work, the job isn’t done until you confirm the cleaning made a measurable difference and take steps to slow down how quickly grime returns. Skipping this check means you have no way to know whether the effort paid off or whether a deeper issue is still affecting your output.
Check your production numbers
Open your monitoring app within 24 to 48 hours of cleaning on the first clear, sunny day after the job. Pull your current daily production figure and compare it directly against the same day type from the previous month or year. A successful cleaning typically restores 5% to 15% of lost output, sometimes more if bird droppings were the main problem.
If your production numbers stay low after cleaning and you’ve ruled out shading or inverter errors, contact a certified installer to inspect your system for cell damage or wiring issues.
Log the date of your cleaning along with the pre- and post-cleaning production numbers somewhere you can reference them later. A simple note in your phone or a basic spreadsheet makes it easy to track how quickly your panels lose efficiency over time and helps you plan your next cleaning interval before losses get significant.
Prevent re-soiling between cleanings
Florida’s combination of heavy pollen seasons, afternoon thunderstorms, and active bird populations means your panels will pick up new grime faster than panels in drier climates. Hard water from irrigation systems near your roofline is one of the most common re-soiling causes, because mineral deposits left by sprinkler overspray are harder to remove than organic debris and often require more aggressive cleaning to clear.
Trim back any tree branches that hang over or near your array to reduce leaf drop and bird perching spots above the panels. If irrigation lines aim anywhere near your roofline, adjust the spray heads to keep water off the glass entirely. Small changes like these can stretch your cleaning intervals to once every 12 to 18 months in most Florida locations.
Key takeaways and next steps
Knowing how to clean solar panels on a roof comes down to three things: the right timing, the right tools, and a method that protects the glass. Start from the ground whenever possible, use deionized water with a soft microfiber mop head, and always shut your system down before you introduce water near any wiring. Check your monitoring app before and after the job so you know whether the cleaning actually moved the needle on your production numbers.
Regular, gentle cleaning every 12 to 18 months keeps most Florida systems running at full capacity without risking scratches or warranty issues. Stubborn mineral scale, persistent underperformance, or panels on steep roofs are all situations where a professional cleaning service makes more sense than a DIY attempt. If your system needs a full inspection or hands-on maintenance, the team at Advance Solar & Spa has serviced Florida homeowners for over 40 years and can help you get your system back to peak output.